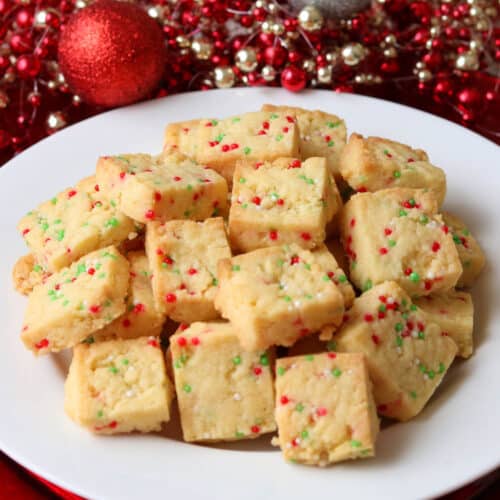
These Thermomix Pinwheel Cookies are fun, festive and delicious, and easy to make thanks to the Thermomix. Perfect for your Christmas party table!

Christmas is just the best time for creative baking and I think you are going to love these Christmas Pinwheel Cookies! They not only look great but they are delicious too.
They do take a bit of time to make - but really, compared to cutting out sugar cookies or gingerbread and icing them, they're actually quicker to make... and they're a bit more of a novelty too.
And of course the Thermomix makes light work of making the dough and also colouring the dough. So in the end, you will have impressive looking cookies to add to your party table, with minimal effort on your part. Win win.

Mama Loves to Cook is a participant in the Amazon Services LLC Associates Program, an affiliate advertising program designed to provide a means for sites to earn advertising fees by advertising and linking to Amazon.com
Why you'll love this recipe
- They look impressive and will add some festive cheer to your party table.
- The Thermomix makes light work of making the dough and mixing in the food colouring.
- You can easily adapt the recipe to different flavours by adding flavoured essence, eg peppermint.
- It's a fun recipe to make with kids.
- It's not just for Christmas - use different colours at other times of year to suit.
Ingredients
This recipe uses standard sugar cookie ingredients which you should hopefully already have in your pantry and fridge.

Exact quantities are found in the recipe card at the bottom of the post.
- White sugar
- Butter - Cold from the fridge. I know most recipes for sugar cookies tell you to use softened butter. But the Thermomix can handle mixing cold butter and it makes the dough less sticky and easier to roll out.
- Egg
- Vanilla extract - you can substitute this with other flavours if you prefer. Peppermint extract is a popular choice at Christmas time. You could also add almond extract, or even other flavours such as cinnamon, lemon zest or orange zest.
- Plain flour (aka all purpose flour)
- Baking powder
- Salt
- Food colouring - I suggest using gel food colouring. This requires less volume to get a stronger colour and is less likely to alter the consistency of the cookie dough.
- Sprinkles for coating (optional)

How to make Pinwheel Cookies
This recipe does take a little time and patience but it is worth it with the end result! There are three steps to the recipe: Making the dough, rolling the dough, and then slicing and baking the dough.
Exact step by step instructions can be found in the printable recipe card at the bottom of the post.
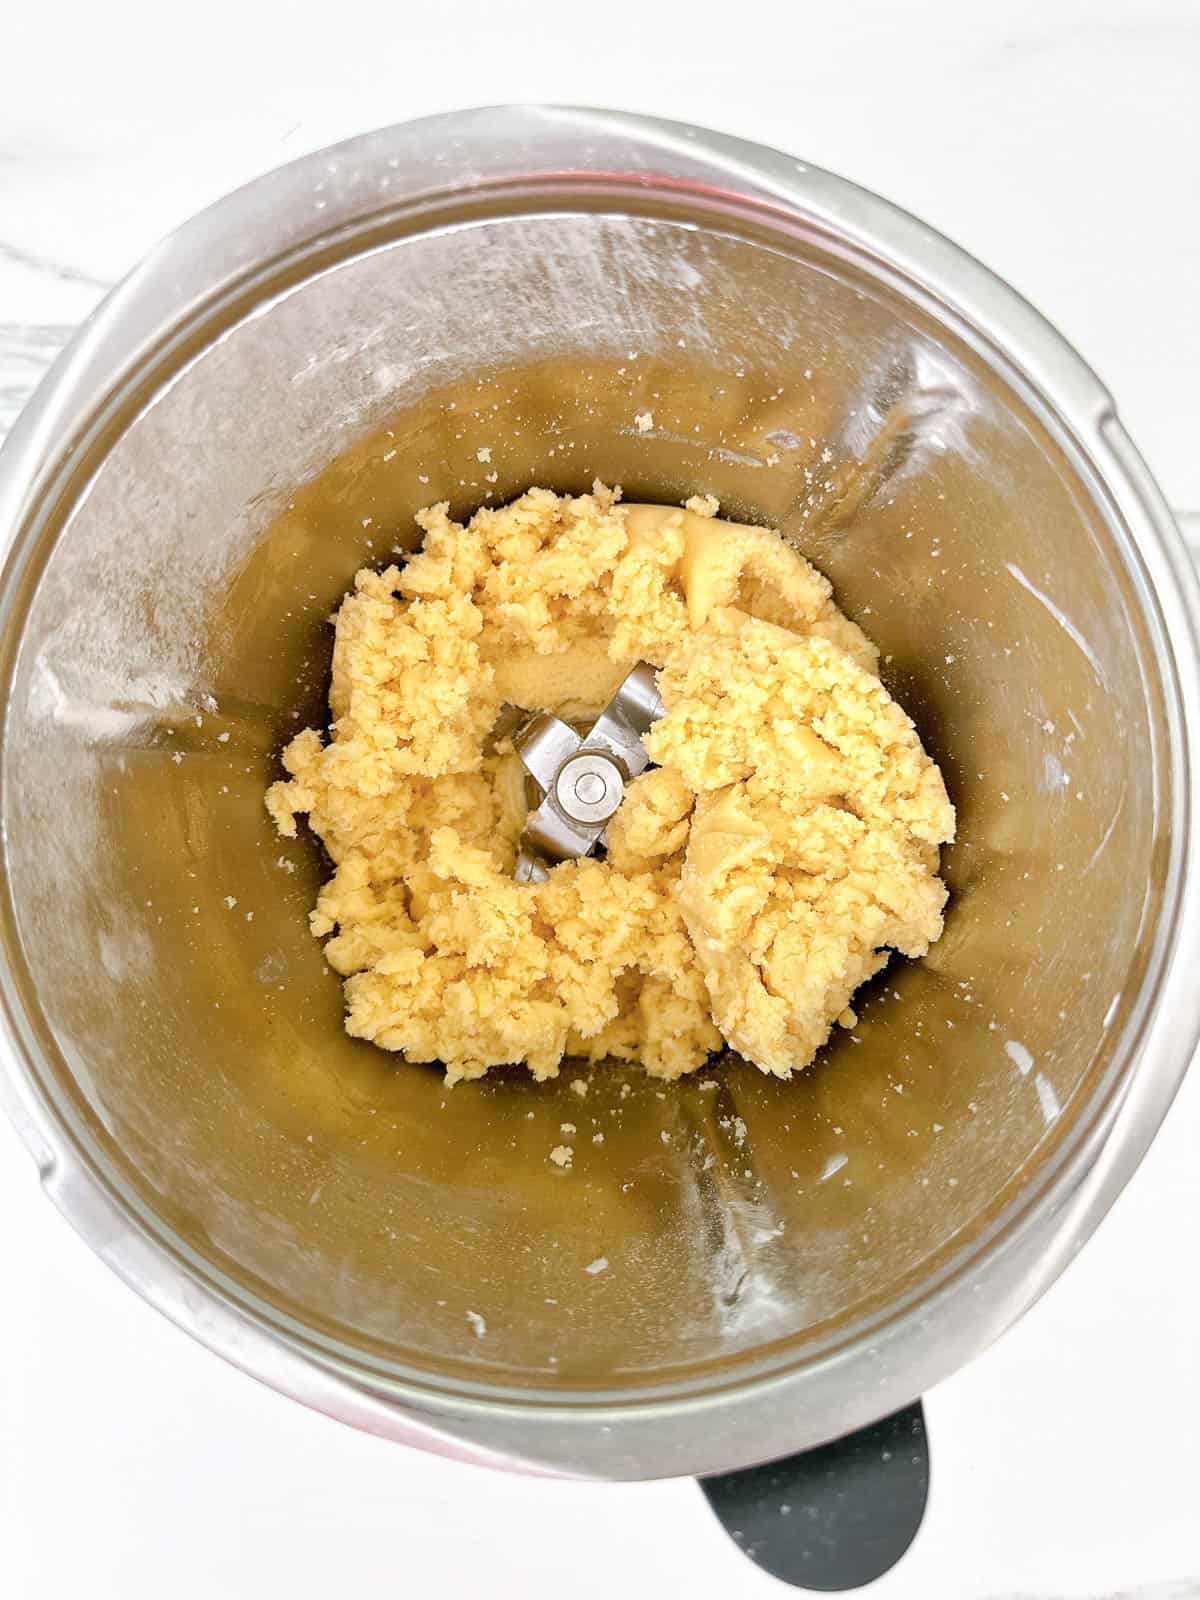
Step 1: Make the Cookie Dough
Making sugar cookie dough in the Thermomix could not be easier. Start by milling the sugar, and then just add all the other ingredients (except the food colouring) and mix. Too easy!
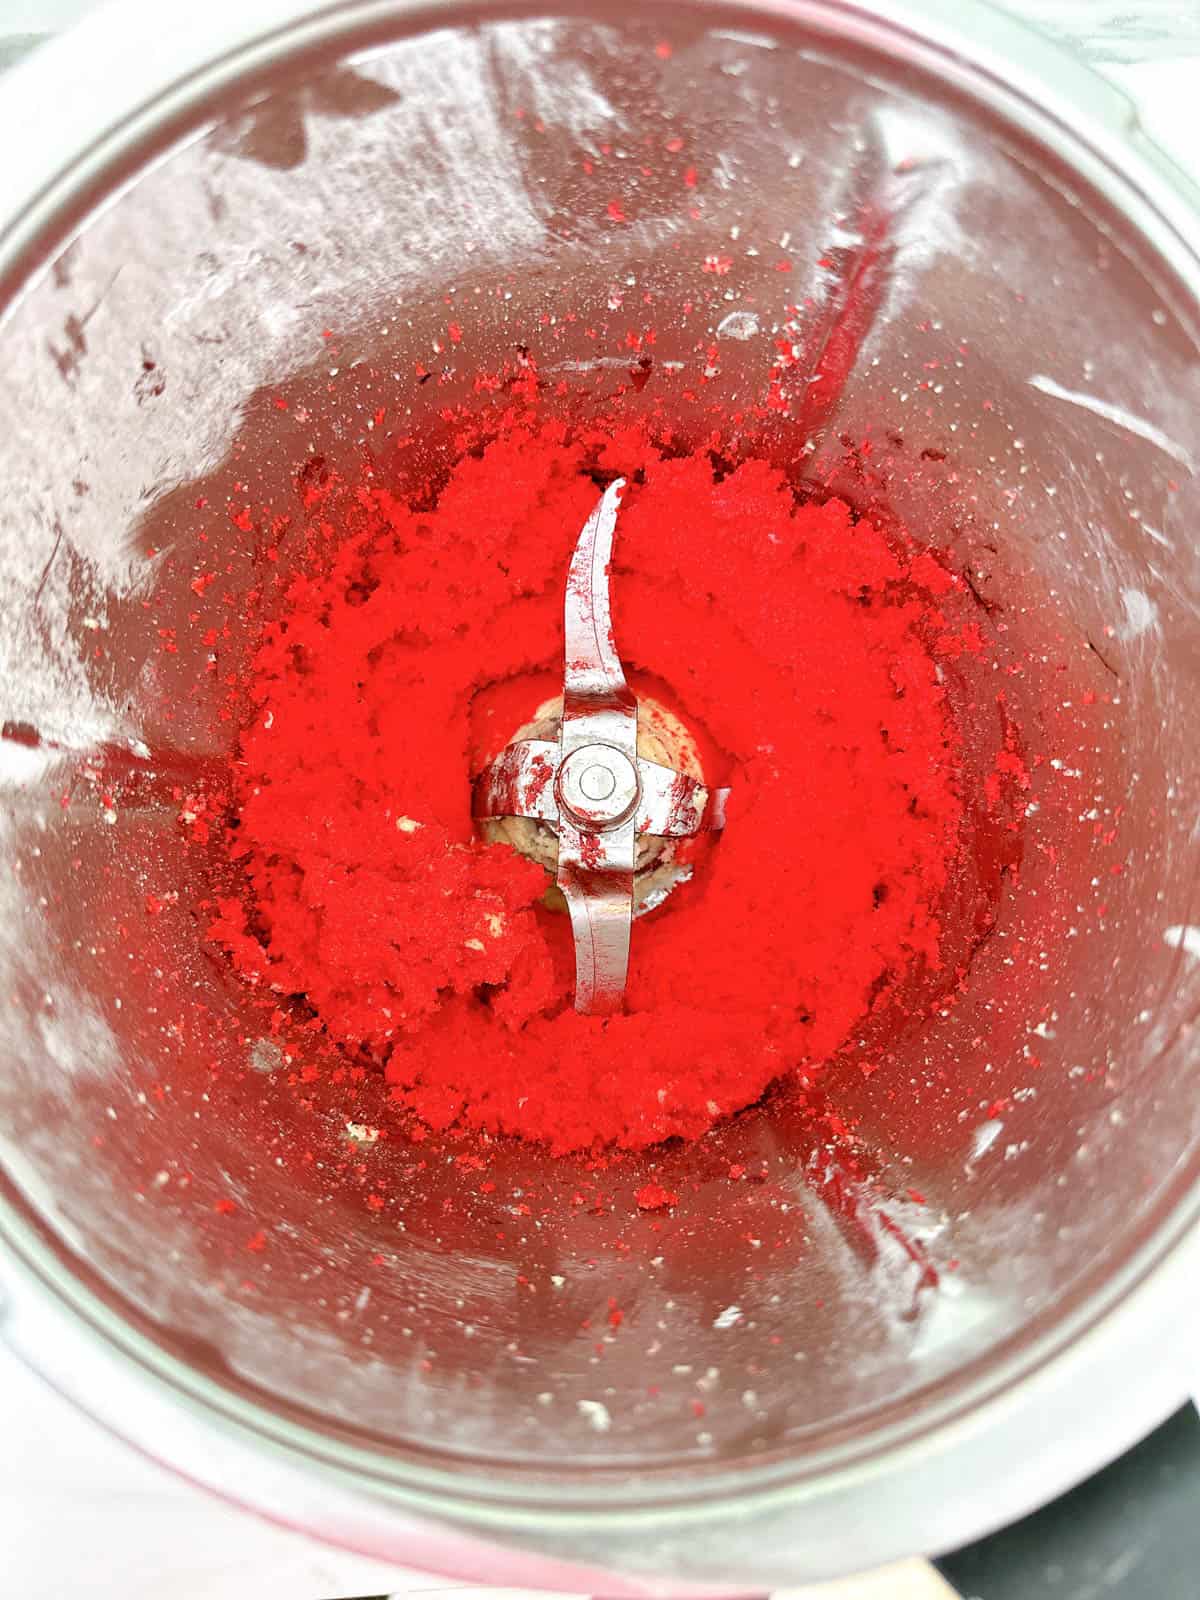
Now turn the cookie dough onto a floured surface and divide into two equal portions. Return one portion to the Thermomix bowl, add your food colouring and then mix again.
Step 2: Rolling the dough
Now you have two equal portions of cookie dough - one plain and one red (or whatever colour you choose). Use your hands to bring together each portion and shape into a rectangle.
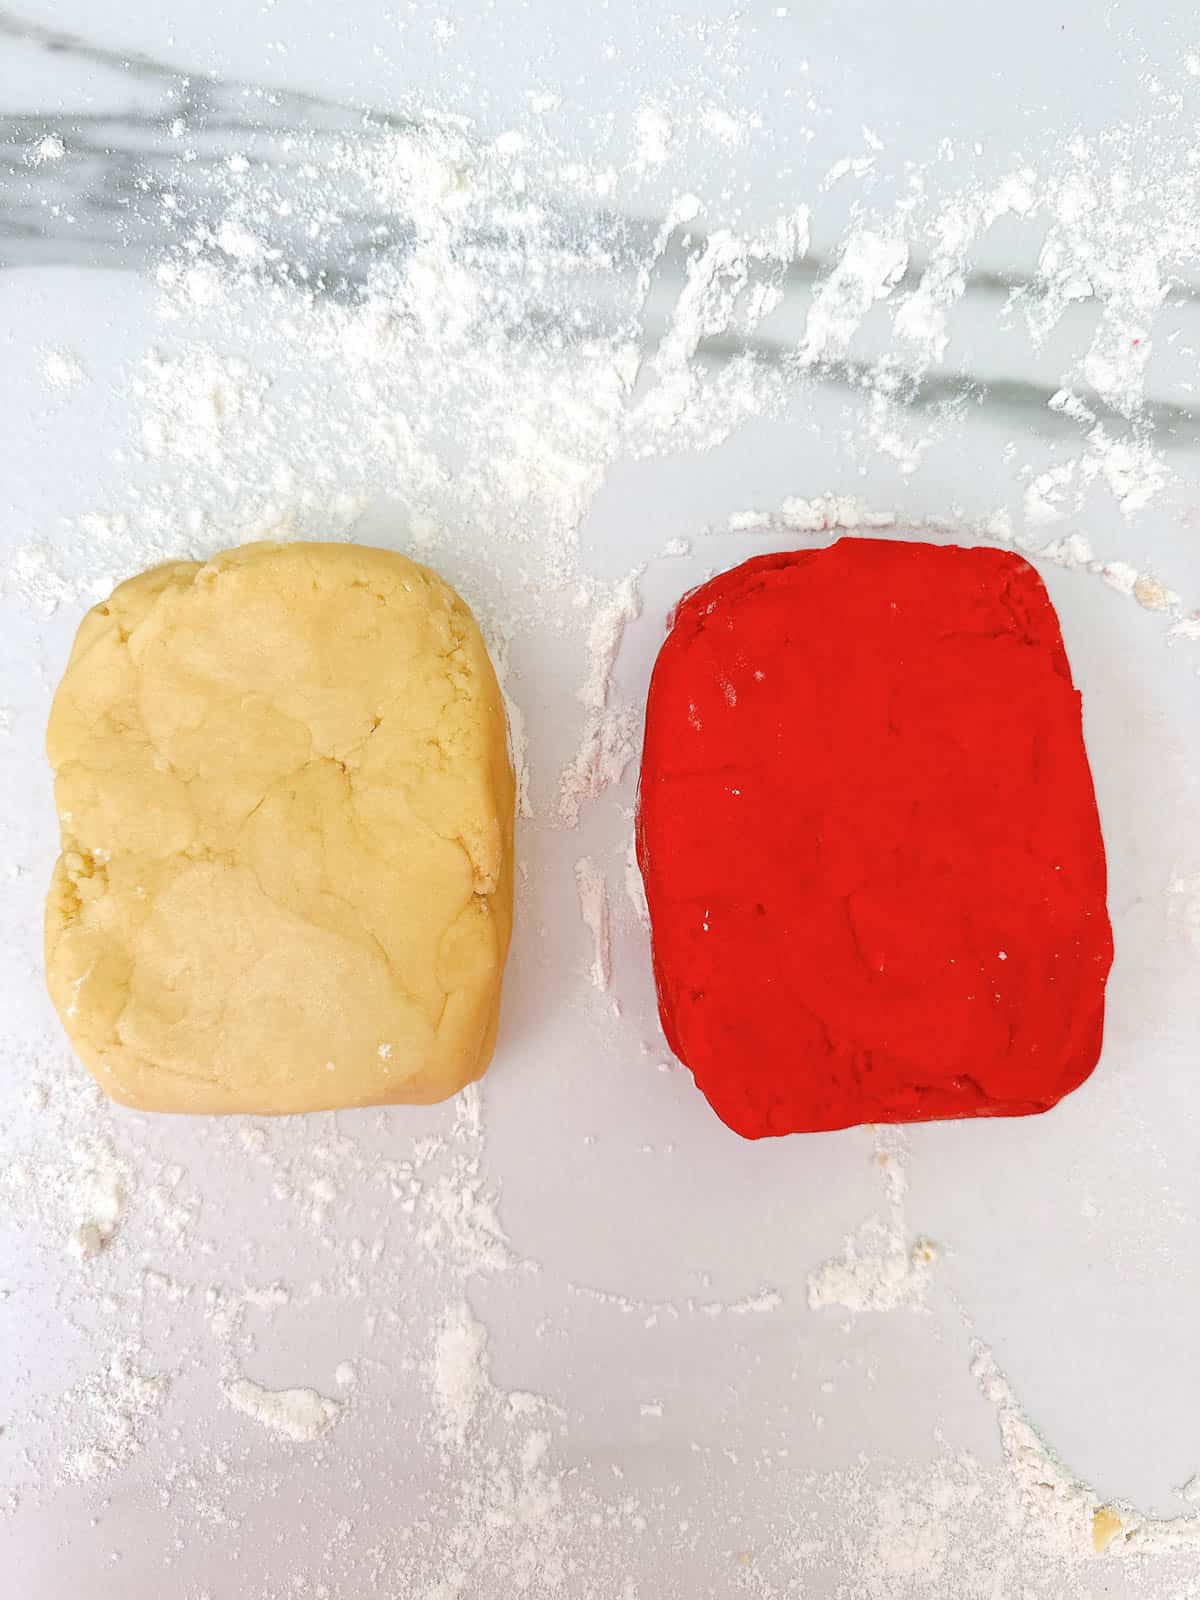
Make sure your surface, hands and rolling pin are all well floured as the dough will be quite sticky.
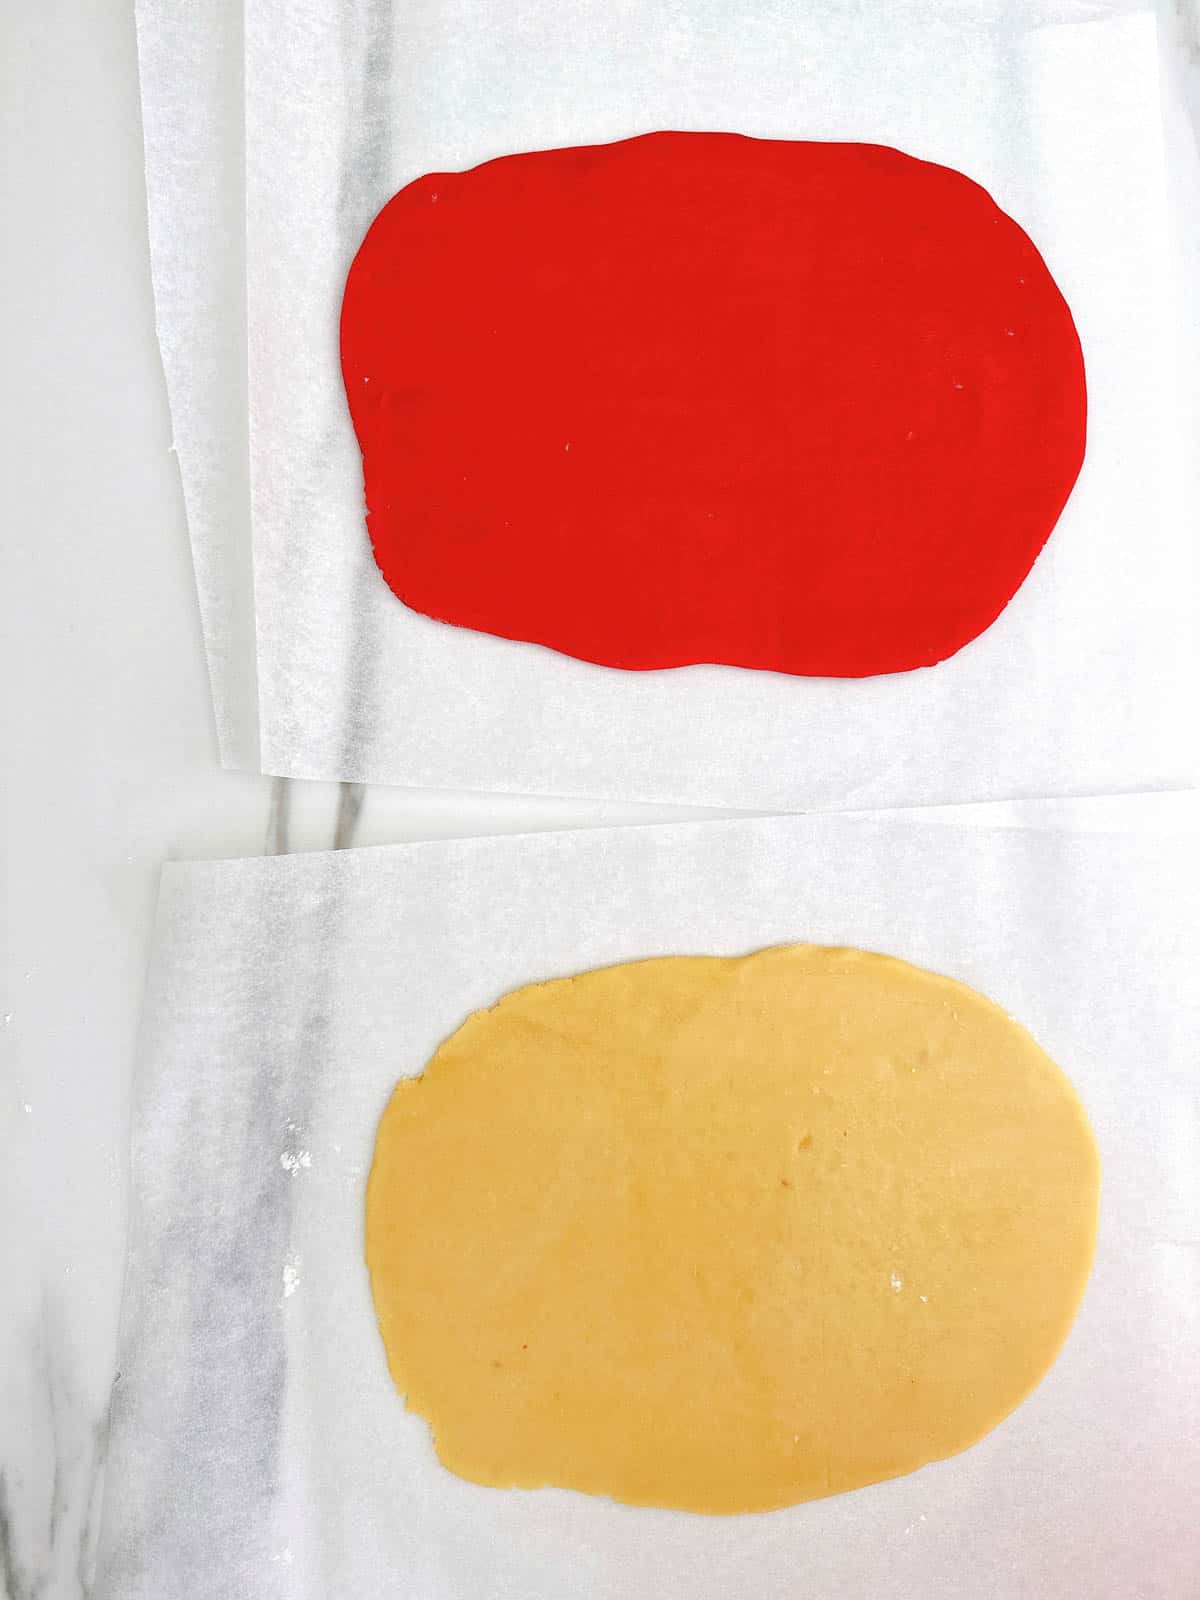
Place each portion of dough onto a piece of baking paper (this will help it stop sticking and also make it easier to move in the next step) and use a rolling pin to roll out each portion to an equal size - roughly 10" x 8" (25 x 20cm) and ¼ inch thick.
Now carefully place one rolled out piece of dough onto the other and use your hands to gently press the two pieces together.
With the shorter edge facing you, carefully roll up the dough away from you to create a sausage shape.

Wrap it in plastic wrap and once covered, you can gently roll the pastry back and forth to ensure a nice round edge all over.
Place the dough in the fridge for approximately 2 hours.
Step 3: Cutting and baking the cookies
There are two ways to add the sprinkles to the outside of the cookies: Rolling the entire roll of cookie dough in sprinkles, or each individual cookie.
I actually like to do both: I start with the entire roll as it is quicker, but then I fill in any gaps on each individual cookie. Feel free to experiment and see which way suits you best.
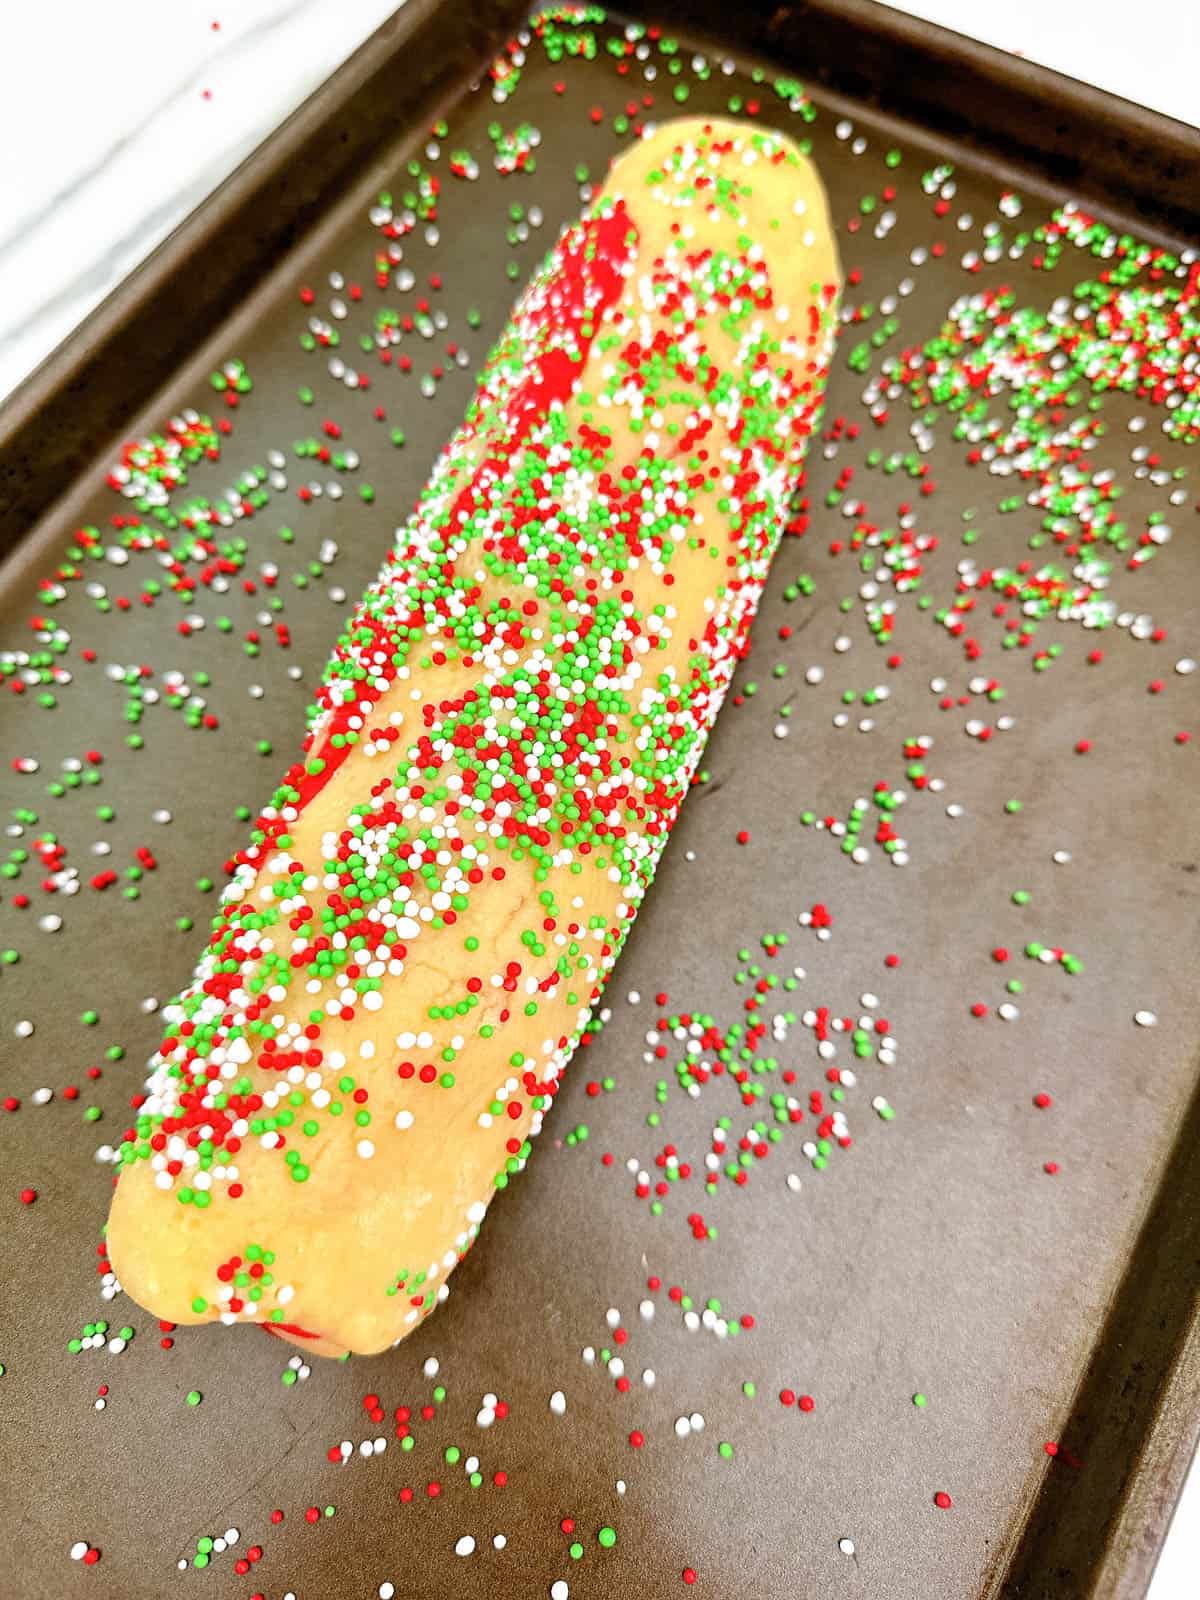
To coat the roll with sprinkles, pour out the sprinkles into a baking sheet and gently roll the cookie dough in, gently pressing down to encourage the sprinkles to sink into the dough a little.
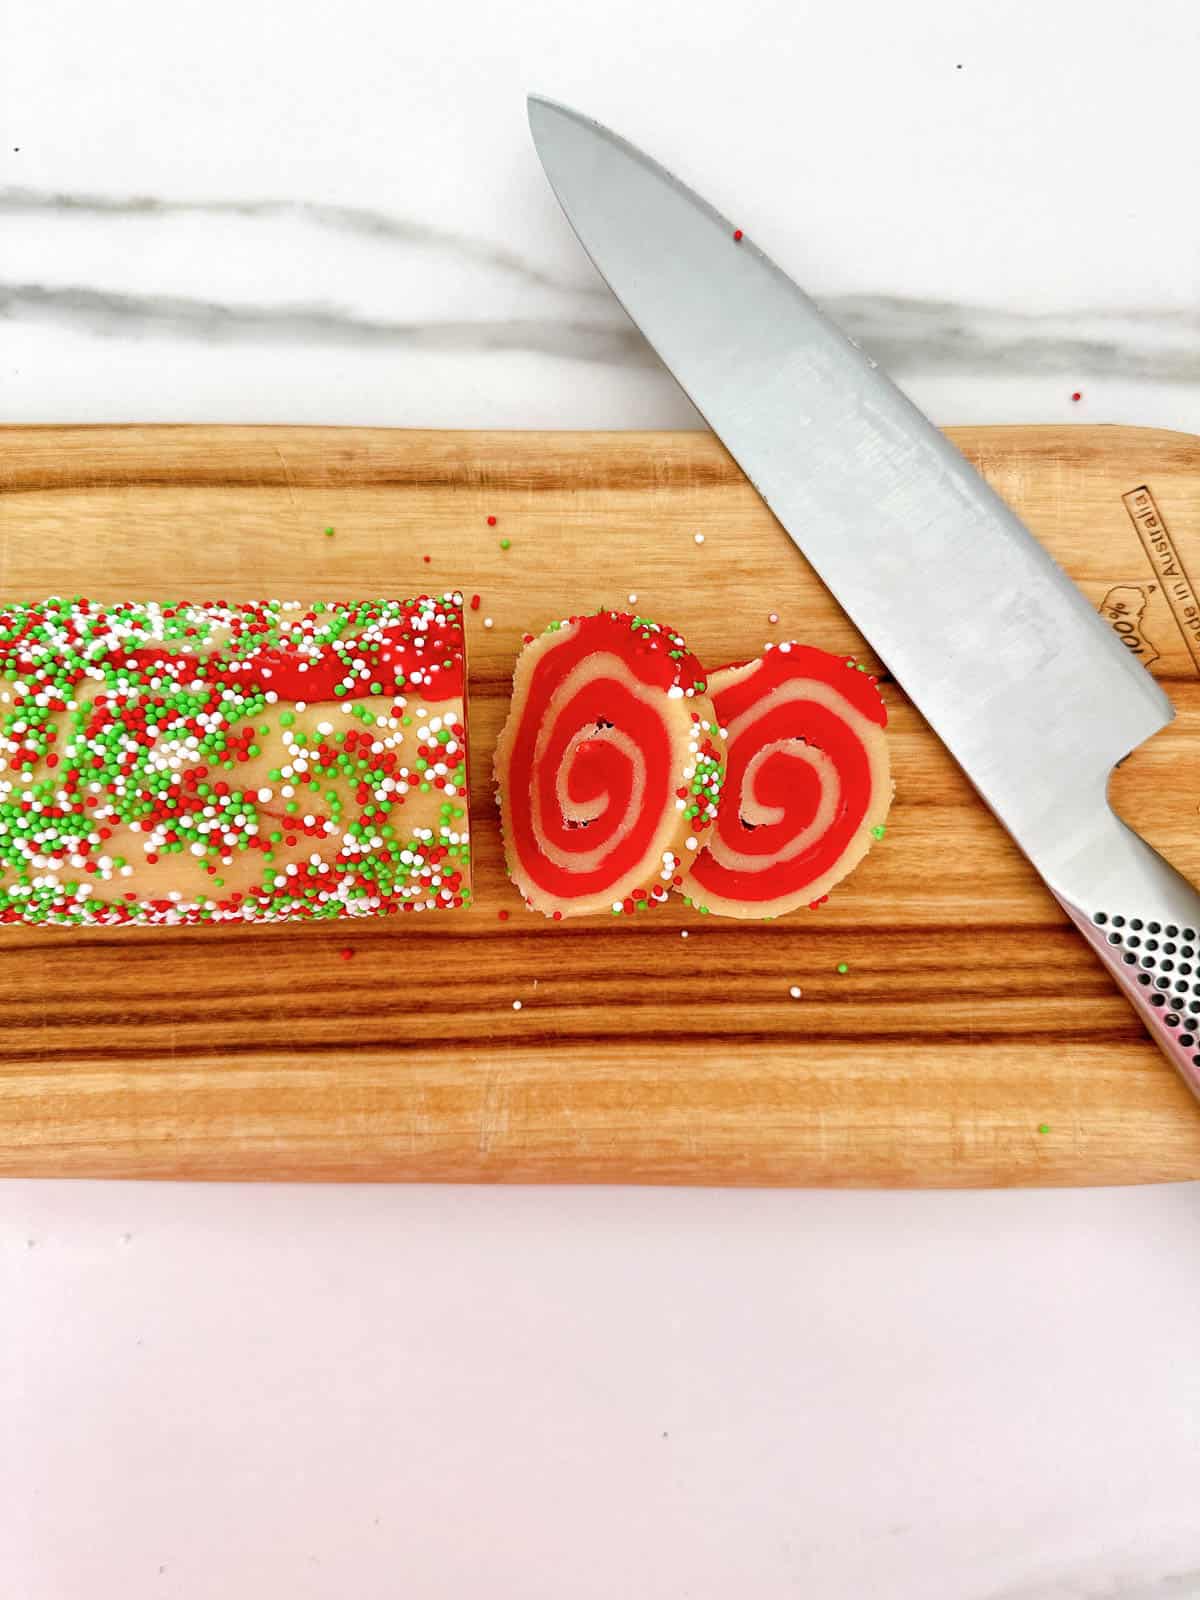
Now take sharp knife and slice the cookies into ¼ inch thick slices.
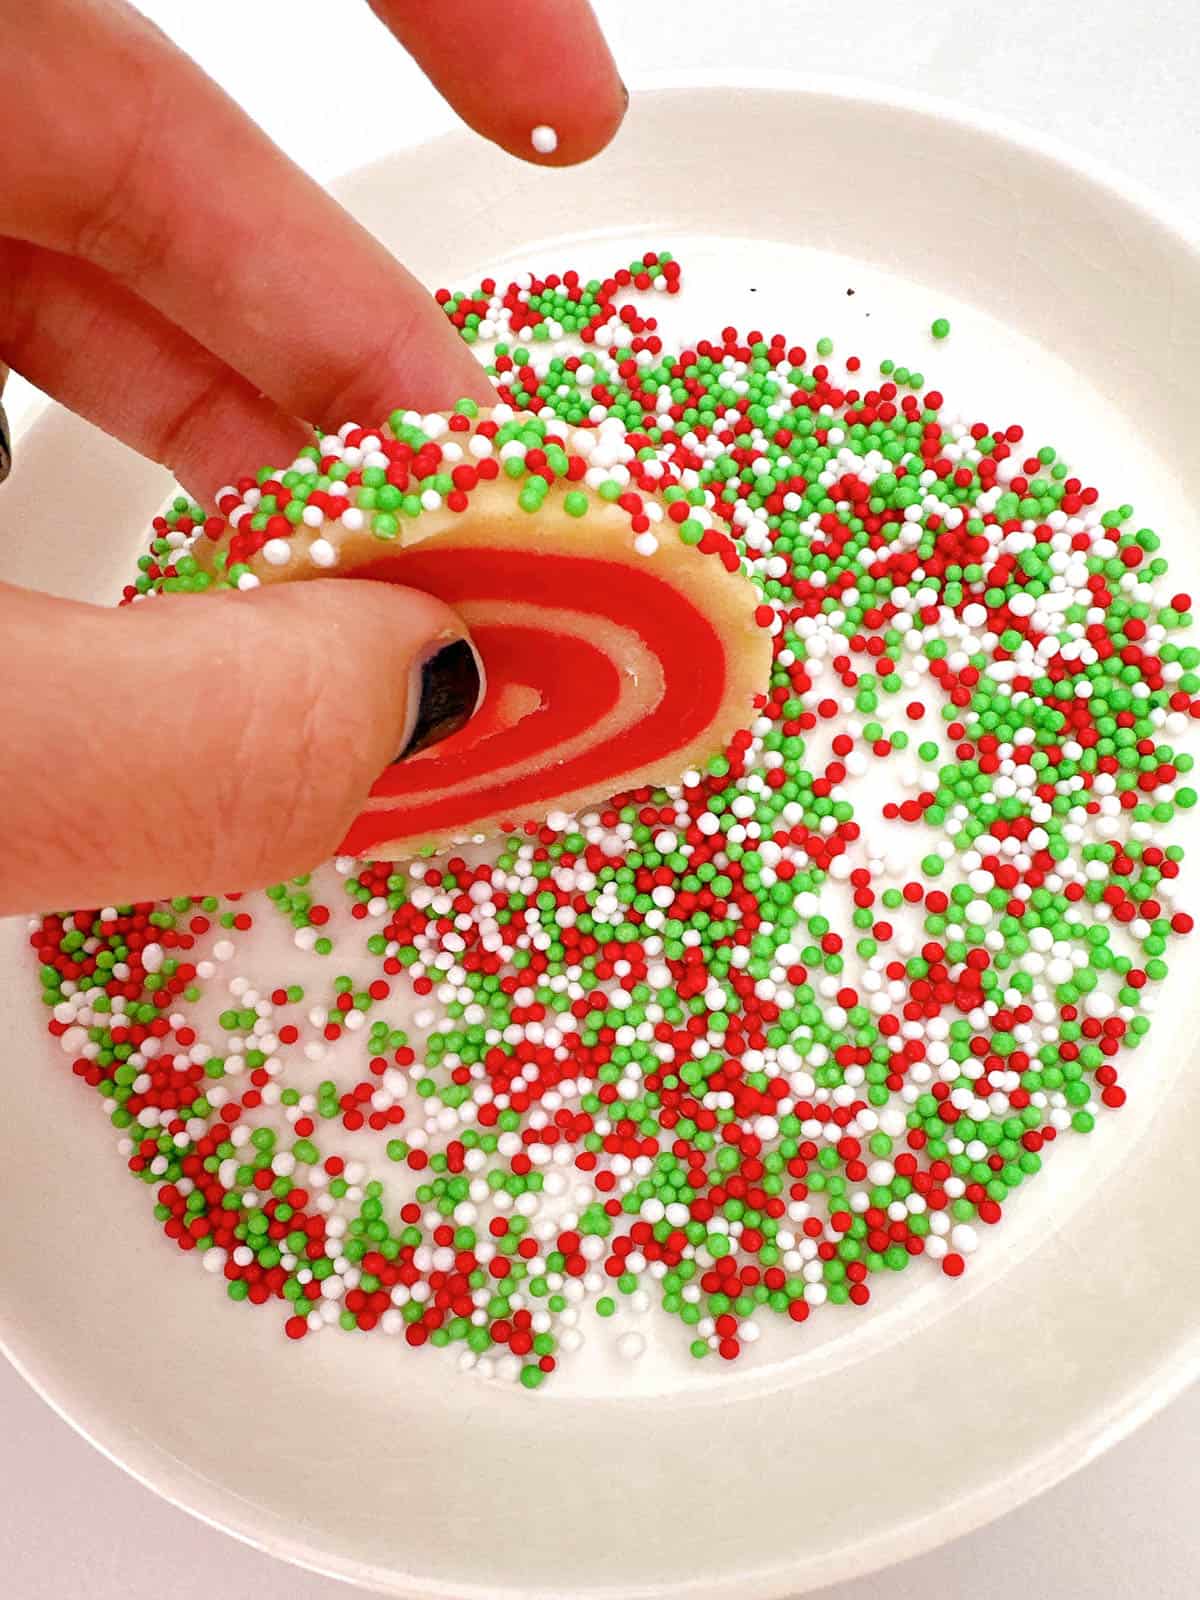
At this stage I like to do a second roll in sprinkles, just to make sure each cookie is evenly coated.
Then lay them out on a baking sheet a couple of inches apart and bake in the oven for around 10 minutes.

Allow them to cool a little on the tray for a couple of minutes and then transfer to a cooling rack.

They will still be a little soft when warm but they will harden up as they cool.
Top Tips
- Don't skip chilling the dough before cutting. Chilled dough holds its shape better in the oven when the cookies are baking.
- Use baking paper on your baking sheet. This not only stops the cookies from sticking to the baking sheet, it also helps prevent them from spreading.
- Make sure your baking sheet is cool when you put the cookies on. If you need to bake the cookies in batches, make sure the baking sheet is cool before you put the next batch on it (I wave mine around the kitchen to cool it down quicker!)
- Keep an eye on the cookies be sure to remove them from the oven before they start to brown.
- Remember that cookies will still be soft when they come out of the oven but they will firm up as they cool.
FAQs
Store these cookies in an airtight container on the counter for up to 1 week.
Yes you can. For best results, layer them between baking paper in a sealable freezer-safe container. They will last for up to 3 months. Thaw and bring back to room temperature before serving.
Yes you can. The best way to do this is double wrap the dough log in plastic wrap and tin foil and seal it in a freezer bag. You can freeze for up to 3 months. Thaw in the fridge and bring back to room temperature before cutting and baking.
Love Cookies? you May also like these recipes:


Did you try this recipe? Please leave me a ⭐ review below!
Don’t forget to tag me on Instagram @mamalovestocookblog and follow along on Pinterest and Facebook! Enjoy!!!

Thermomix Pinwheel Cookies
Ingredients
- 150 g white sugar
- 170 g butter cold from fridge is best
- 1 egg
- 1 teaspoon vanilla extract
- 280 g plain flour
- ½ teaspoon baking powder
- ½ teaspoon salt
- few drops red food colouring
- 3 tablespoon Christmas non pareils (aka sprinkles or 100s & 1000s)
Instructions
- Add the sugar to the Thermomix bowl. Mill for 10 seconds / speed 9.
- Add the butter, egg, vanilla extract, flour, baking powder and salt to the bow. Mix for 10 seconds / speed 7.
- Scrape down the bowl and repeat for 5 seconds / speed 7.
- Turn the dough out onto a floured surface and divide into two equal portions.
- Return one portion of dough to the Thermomix bowl. Add the food colouring and mix for 5 seconds / speed 7. Then turn out onto the floured surface.
- Use your hands to bring each portion of dough together and shape it into a rectangle.
- Place one rectangle of dough onto a sheet of baking paper and use a rolling pin to roll it out into a large rectangle approximately 10" x 8" (25 x 20cm) and ¼ inch thick. Repeat with the other portion of dough.
- Now carefully place one rolled out piece of dough onto the other and use your hands to gently press the two pieces together.
- With the shorter edge facing you, carefully roll up the dough away from you to create a sausage shape.
- Wrap it in plastic wrap and once covered, you can gently roll the pastry back and forth on the counter to ensure a nice uniform round edge all over. Place the dough in the fridge for approximately 2 hours.
- When you are ready to bake the cookies, pre-heat the oven to 170 C / 350 F.
- To coat the roll with sprinkles, pour out the sprinkles into a baking sheet and gently roll the cookie dough in, gently pressing down to encourage the sprinkles to sink into the dough a little.
- Use a sharp knife to cut the cookie dough log into even slices around ¼ inch thick.
- At this stage you can do a second roll of the edge of the cookie in the sprinkles, to ensure it is evenly coated.
- Lay the cookies out on a baking sheet lined with baking paper a couple of inches apart and bake in the oven for around 10 minutes.
- Allow the cookies to cool on the baking sheet for a couple of minutes and then transfer to a cooling rack to cool completely.

Leave a Reply