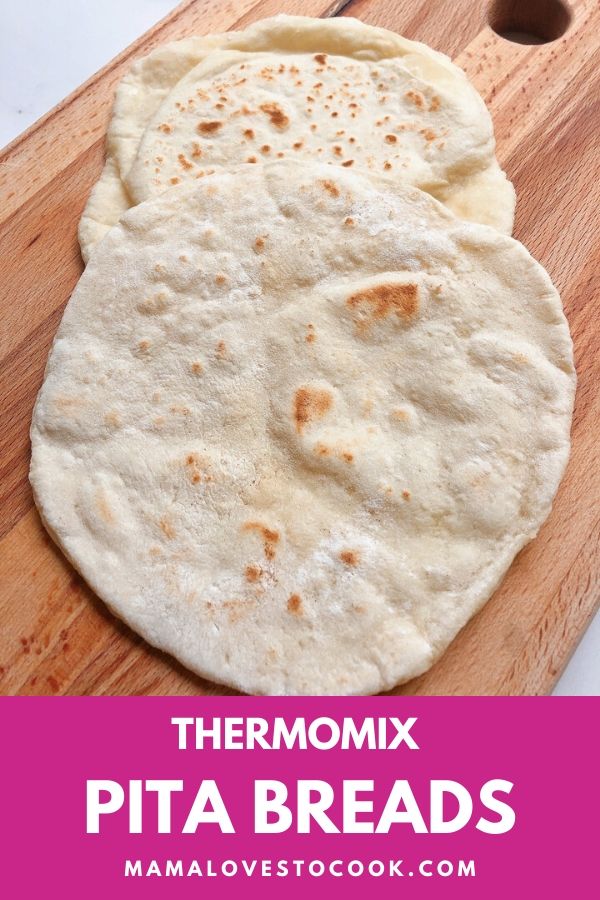
This homemade Thermomix Pita Bread recipe is very easy to make and results in fresh, warm, delicious puffy pita bread.
One of the best thing about the Thermomix is its kneading function. It makes it so easy to make all kinds of bread - including pizza dough, tortillas and these wonderful easy homemade pita bread.
Once you've tried this pita bread fresh from the pan, you will never want to buy it from the shop again!
Ingredients for Pita Bread
This recipe for pita bread uses just five ingredients - including water! You will need:
- Yeast (I use instant yeast, which needs no sugar to activate)
- Water
- Flour (I find bread flour is the easiest to work with, but usually I use plain flour as that is what I always have in the cupboard)
- Salt
- Extra virgin olive oil (you could use ordinary olive oil if that is all you have)


How to make Pita Bread
Luckily when you make pita bread in the Thermomix it pretty much makes the dough for you, thanks to its awesome kneading function.
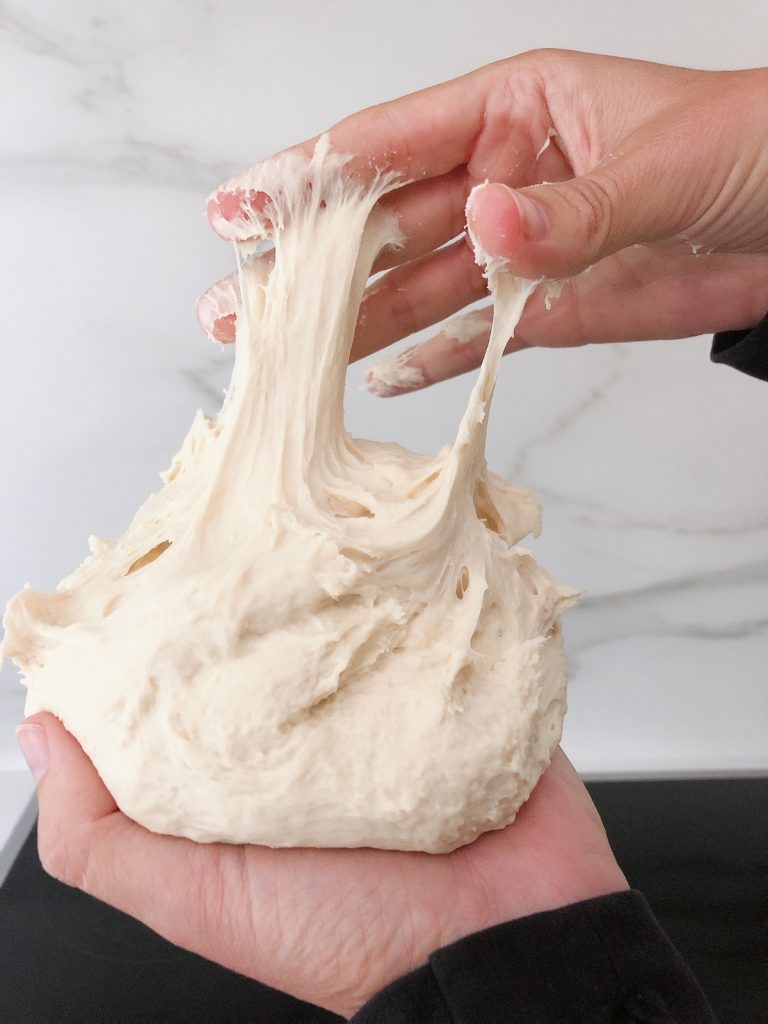
Note that the dough for this homemade pita bread recipe is much more sticky than other dough you may be used to. It has more water in it than both our pizza dough and tortilla dough. So don't worry if it seems very sticky.
Once you have your dough, you need to allow it to rise for at least an hour - perhaps more depending on how warm your kitchen is. You want it to double in size.
Make sure you lightly grease the bowl before you put the dough in and cover the bowl. I usually use a damp tea towel, but you can use plastic wrap too.
Once it has risen, punch down the dough and divide it into 10 balls. It is a good idea to keep these dough balls in the covered bowl to prevent them from drying out while you roll out the others.
Now on a very well floured surface (remember the dough is very sticky), roll out the pita bread to around 8 inches wide and ¼ inch thick.
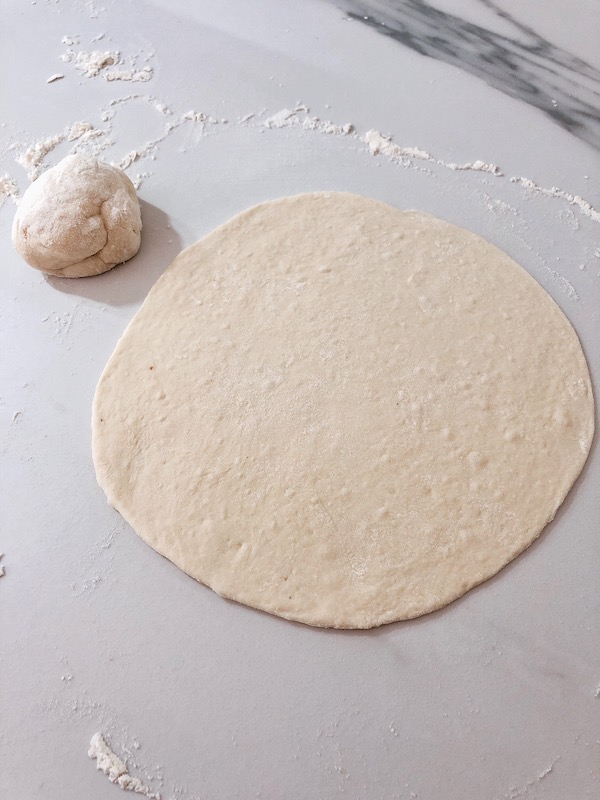
It helps to turn the ball a quarter turn each time you roll. So roll, turn, roll, turn until you have a round flat circle.
Once you have a couple of pita breads rolled out, you can heat up your frying pan. Use a dry, non-stick frying pan and heat it on a medium-high heat.
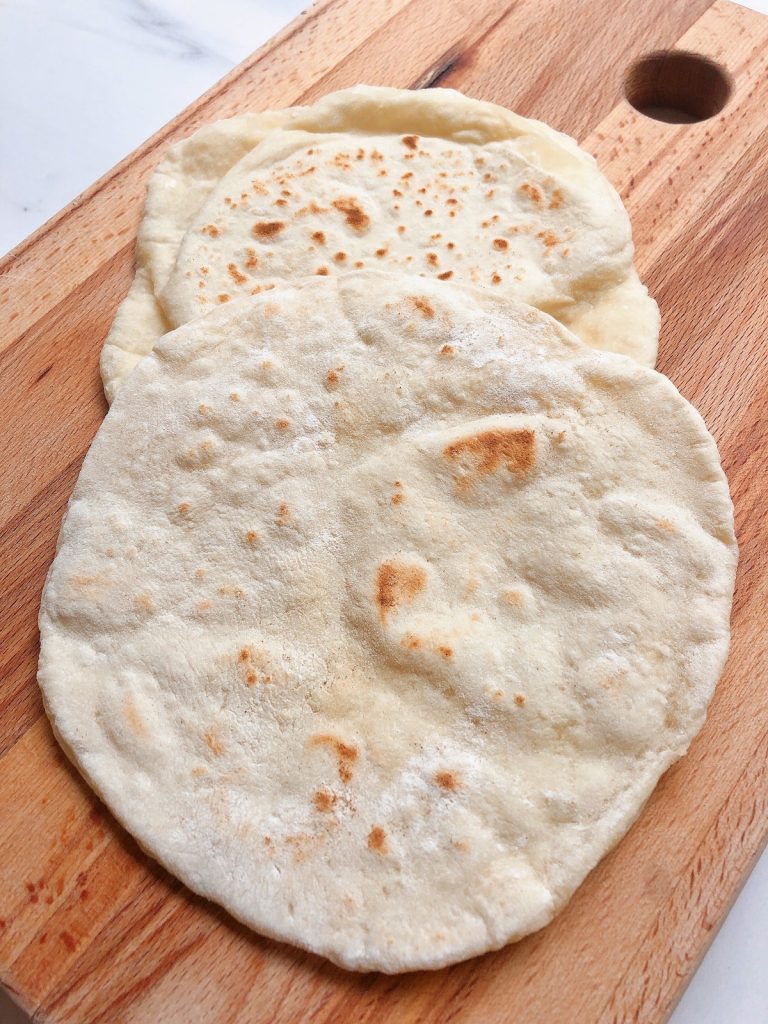
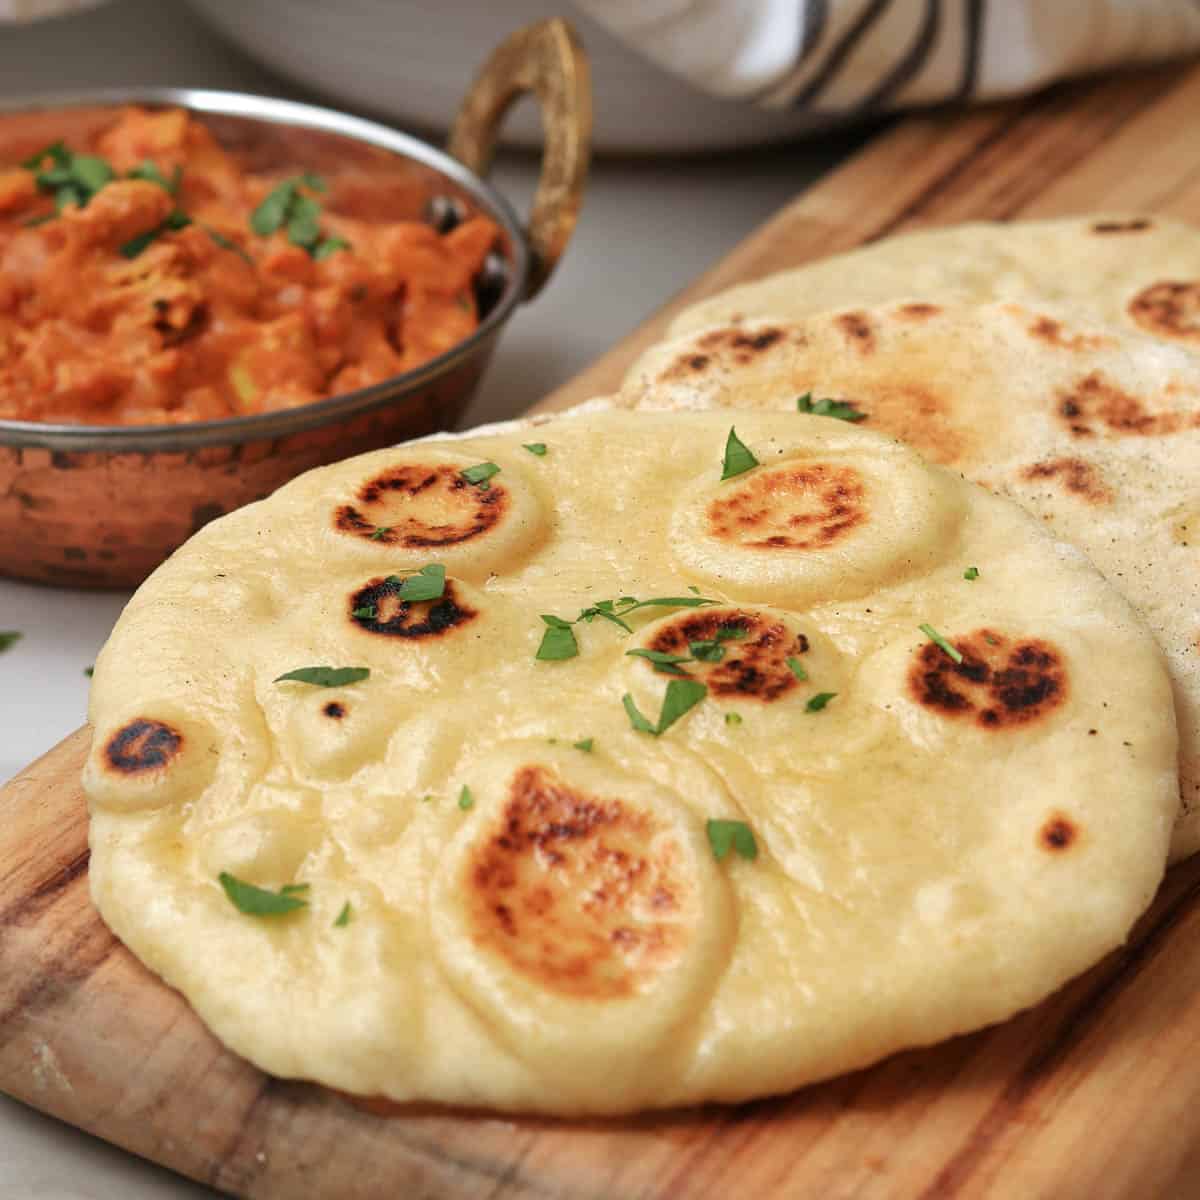
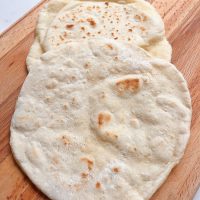
Once it is hot, toss in your first pita bread and cook for 30 seconds on the first side. It shoud start to form colored patches. Now flip it over and cook the other side for 1-2 minutes.
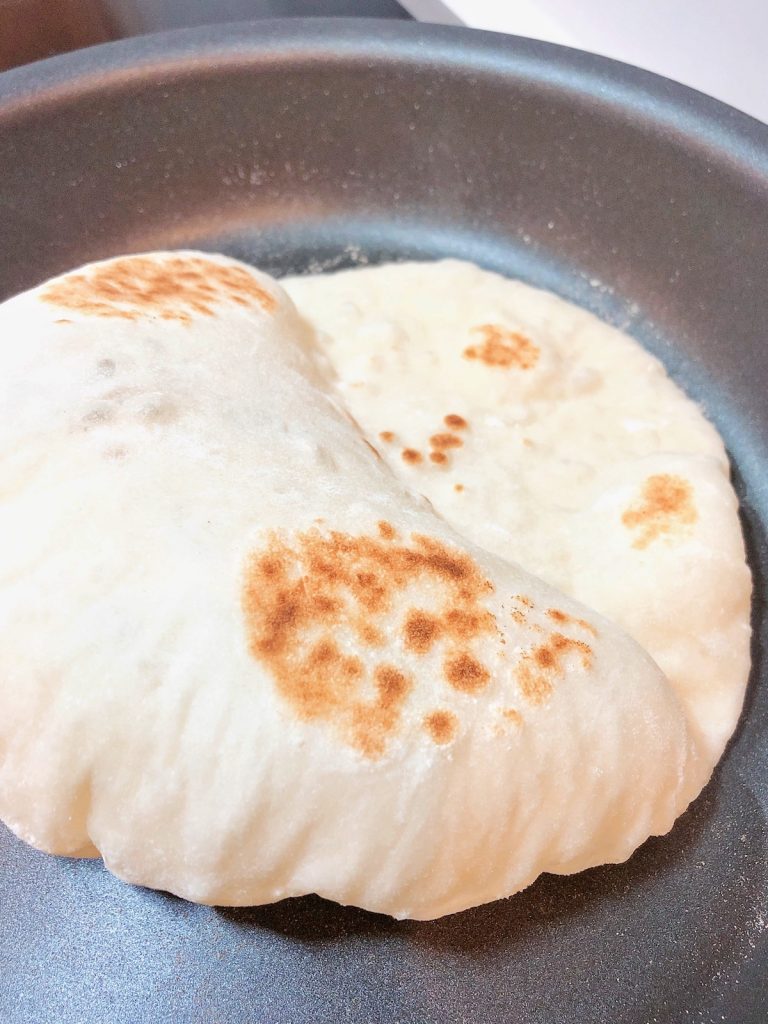
At this stage it should start to puff up to form an air-filled pocket. Once it has formed toasted brown patches on the underside, flip it over again to the first side and continue to cook for one more minute.
Then set aside and keep the cooked pita breads covered with a clean tea towel until ready to serve.
Continue to roll and cook the pita breads until you have used them all (you can roll the next one while the one before is cooking to save time and be more efficient).
How to store Pita Bread
Once cooked you can store the pita bread in an air tight bag in the fridge for a few days.
You can also store the dough in the fridge for up to a week. So if you don't have time to cook them all at once or you prefer to make fresh pita breads another day, just store any leftover dough in a sealed bag in the fridge.
Just bring it back to room temperature again before you roll it out and cook it as above.
Can you freeze Pita Bread?
Yes you can! They will store in our freezer for up to 3 months. To freeze them, store them in an air-tight freezer bag with a piece of baking paper between each one, to make taking them apart easier.
How to warm up Pita Bread
If you are re-heating one or two pita breads from the fridge, I find the easiest way to re-heat them is just to repeat the process above with the dry frying pan.
If you want to re-heat several pita breads at once, you can also wrap them in aluminium foil and warm in a pre-heated oven for around 10 minutes. This works for frozen pita bread too (no need to thaw first).
Alternatively, you can re-heat quickly in the microwave for around 10-20 seconds.
What to do with Pita Bread
Pita bread is very versatile and there are loads of things you can do with it.
Here are some ideas:
- Make pita bread wraps - use whatever fillings you like!
- Fill with falafel, chicken shawarma or lamb koftas
- Use as an instant pizza base
- Cut up and toast and use as chips with a dip
- Cut up and serve warm with hummus
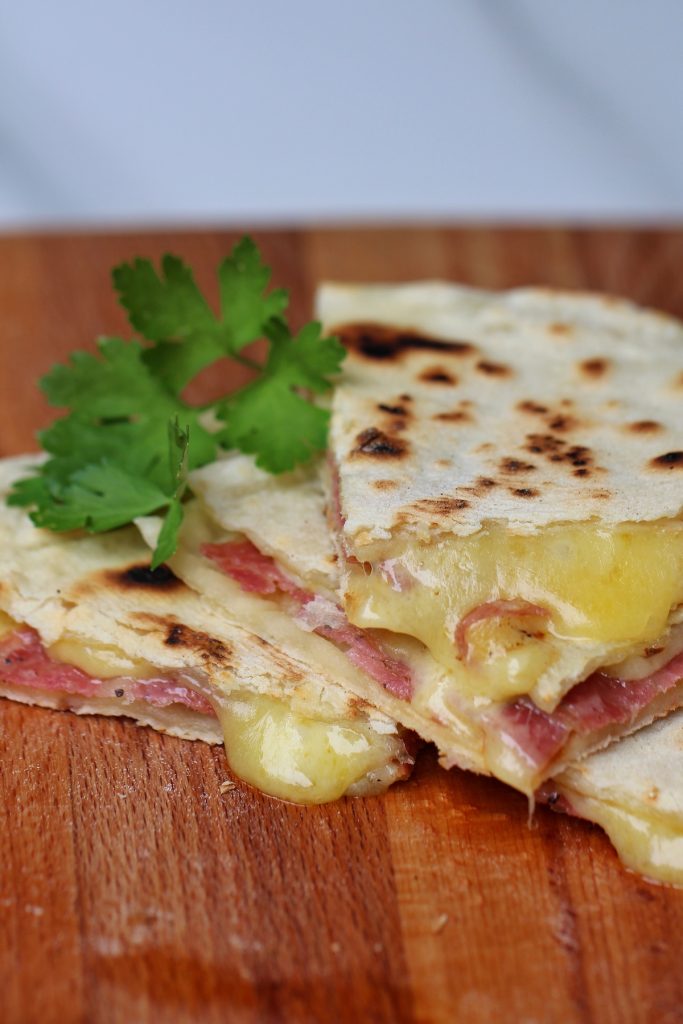
- Use instead of tortillas to make quesadillas
- Make toasted sandwiches (see photo above)
LOVE BREAD BAKING? YOU MAY ALSO LIKE THESE RECIPES:

Did you try this recipe? Please leave me a ⭐ review below!
Don’t forget to tag me on Instagram @mamalovestocookblog and follow along on Pinterest and Facebook! Enjoy!!!
Pin it for Later!

Mama Loves to Cook is a participant in the Amazon Services LLC Associates Program, an affiliate advertising program designed to provide a means for sites to earn advertising fees by advertising and linking to Amazon.com
Thermomix Pita Bread
Equipment
- Rolling Pin
Ingredients
- 2 teaspoon instant yeast or 7g sachet
- 250 g water
- 400 g plain flour
- 1 teaspoon salt
- 30 g extra virgin olive oil
Instructions
- Add yeast and water to Thermomix bowl. Mix for 1 minute / 37 degrees / speed 1.
- Add flour, salt, olive oil. Knead for 2 minutes / lid closed / knead.
- Grease a large bowl with a little olive oil. Transfer the dough to the bowl and cover with a damp tea towel or plastic wrap. Leave to rise for at least 1 hour.
- Divide the mixture into 10 balls. Keep the balls in the covered bowl while you roll out the other balls to prevent them from drying out.
- Roll out the pita bread on a well floured surface to around 8 inches wide and ¼ inch thick. It helps to turn the ball a quarter turn each time you roll. The dough is quite sticky so you will need to have lots of flour on your board.
- Heat a non-stick frying pan over a medium-high heat. When it is hot, add your first pita bread.
- Cook for around 30 seconds on the first side, then flip and cook for 1-2 minutes on the second side. Then flip again to the first side for a further 1 minute. The pita bread should puff up to form an air-filled pocket and have toasted brown spots on it.
- Continue to roll and cook the pita breads until you have used them all (you can roll the next one while the one before is cooking).
- Keep the cooked pita breads covered with a clean tea towel until ready to serve.

The best pita bread recipe ever! we make this weekly